
I’m building a big scary laser in my garage. The same garage with cars going in and out…and yardwork. It’s a challenge keeping all the laser-y parts clean. Some parts, like the laser crystals, can’t be cleaned so if they get dirty and you can’t blow the dust off them, you are probably buying new ones.
Given that environment, it was time to design a chassis for my project so I could keep the dust out. I know I will be in there tinkering, so I need to design something that is flexible. And I also plan to take this outside, so the inside needs to be well protected so it can stay very clean.
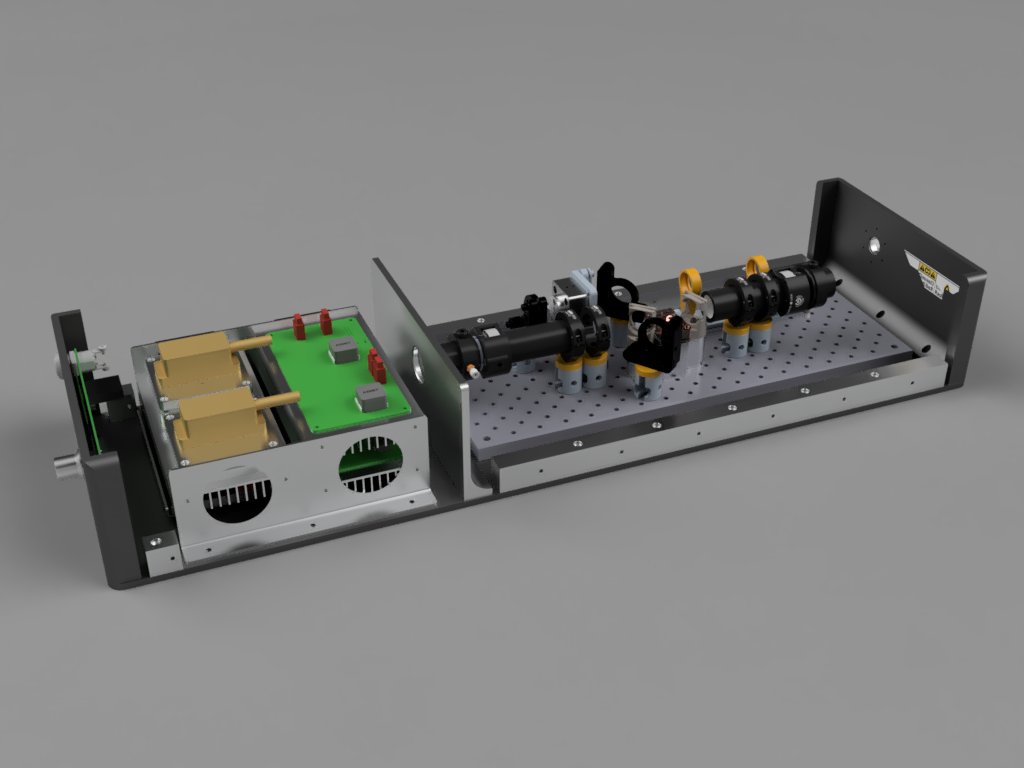
I did do a bit of searching for off-the-shelf cases that could work, but found nothing large enough. Once I started laying out a design big enough to hold the resonator and electronics I was a little surprised how big it was. The resonator is built on a 6x18” optical breadboard, which is fairly compact. Once I added in the electronics, batteries and pump lasers I ended up with a chassis that was almost 3’ long and 10” wide. The goals:
The electronics need to have openings for fans to blow air through, so the resonator needs to stay in a separate section that can remain dust-free.
The resonator needs to be accessible for future tinkering. This thing is not yet producing the power I want it to, and I also want to experiment down the road with Q-switching, so I need the ability to completely re-align the resonator if I need to.
I need to be able to carry it around. As large as it is it will need handles.
Hello Fusion 360
If you’re a maker and never used Autodesk’s Fusion 360 program you are missing out. It is the easiest to use CAD program I’ve ever used. I was able to parametrically model the whole chassis design, including the full resonator, electronics and batteries. This allowed me to create variables for key aspects of the design and change them, and have the entire design track to those changes.
Sectional drawings and interference analysis allowed me to ensure all the parts fit together perfectly. I had Fusion 360 calculate the center of mass for the chassis and used that to decide where to put carry handles.
Did I mention that Fusion 360 is free to use if you’re a hobbyist?

Fusion 360 showing a section view of the front of the chassis.
I decided early on I would design the case I want…and then upload it for manufacturing and find out what it cost…and then go back and design the case I can afford.
The case design is a machined aluminum bottom plate. It’s .250” thick and has threaded holes to hold all the parts. On top of this end plates for the laser output and control panel are screwed, as is a center baffle that divides the electronics and resonator sections. The baffle does have a large hole in it so I can feed electrical and fiber optics into the resonator section. My intention was to wrap this bundle of connections with weather stripping so I can seal the gaps tight from dust. The cover for the case was machined from a block of aluminum and why not: I chose to have the whole thing anodized in a Pantone deep red.
So the case I designed turned out to cost about $6000.00 to manufacture. The most expensive part was the case cover. Milling a solid block of aluminum 30”x10”x5” is not cheap. I redesigned the part using Fusion 360’s sheet metal tools. The company I’m using for manufacturing can bend sheet metal up to .250” thick, so it was an easy replacement.
I also dropped the custom color. It wasn’t that much more expensive, but it was not available for sheet metal parts. I black anodized it all and had it bead blasted for that nice “Apple” look.
Moving to sheet metal for the top cover had a drawback — I don’t care how perfect the machinery is, a sheet metal bend is never going to be as precise as a fully machined part. I was worried the bend radius wouldn’t exactly match the bends on the inner baffle, leading to dust ingress. To mitigate this I found a nice closed cell foam gasket tape. I inset the dimensions of the inner baffle by the recommended compression width of the tape. The idea is that all the parts that need to mate with the top cover will have these foam gaskets to keep the gunk out.
The last touch were two custom designed carry handles. Actually, I found some handles online that I very much liked, but they were polished stainless steel and $250 each. I recreated them in Fusion 360 and will remake them in aluminum.
Off to Manufacturing
I’ve used Hubs to manufacture things before. They made the custom crystal mounts for the resonator and the mounts for the pump lasers. Everything I’ve had made they’ve done a great job on. But this project is sizable, with a cost to match. I wanted to shop around and see what other manufacturers charge. I created accounts at Protolabs and Xometry and uploaded my parts to each to see what each offered. Xometry was no cheaper than Hubs and had fewer finish options. Protolabs didn’t seem to offer anodizing. They have an alternate service called “myRapid”, but it wasn’t clear when I would choose one over the other. I will keep these to in mind for future work but I didn’t see any significant advantage over Hubs.
So me and my American Express card sent 15 parts over to Hubs to be manufactured.
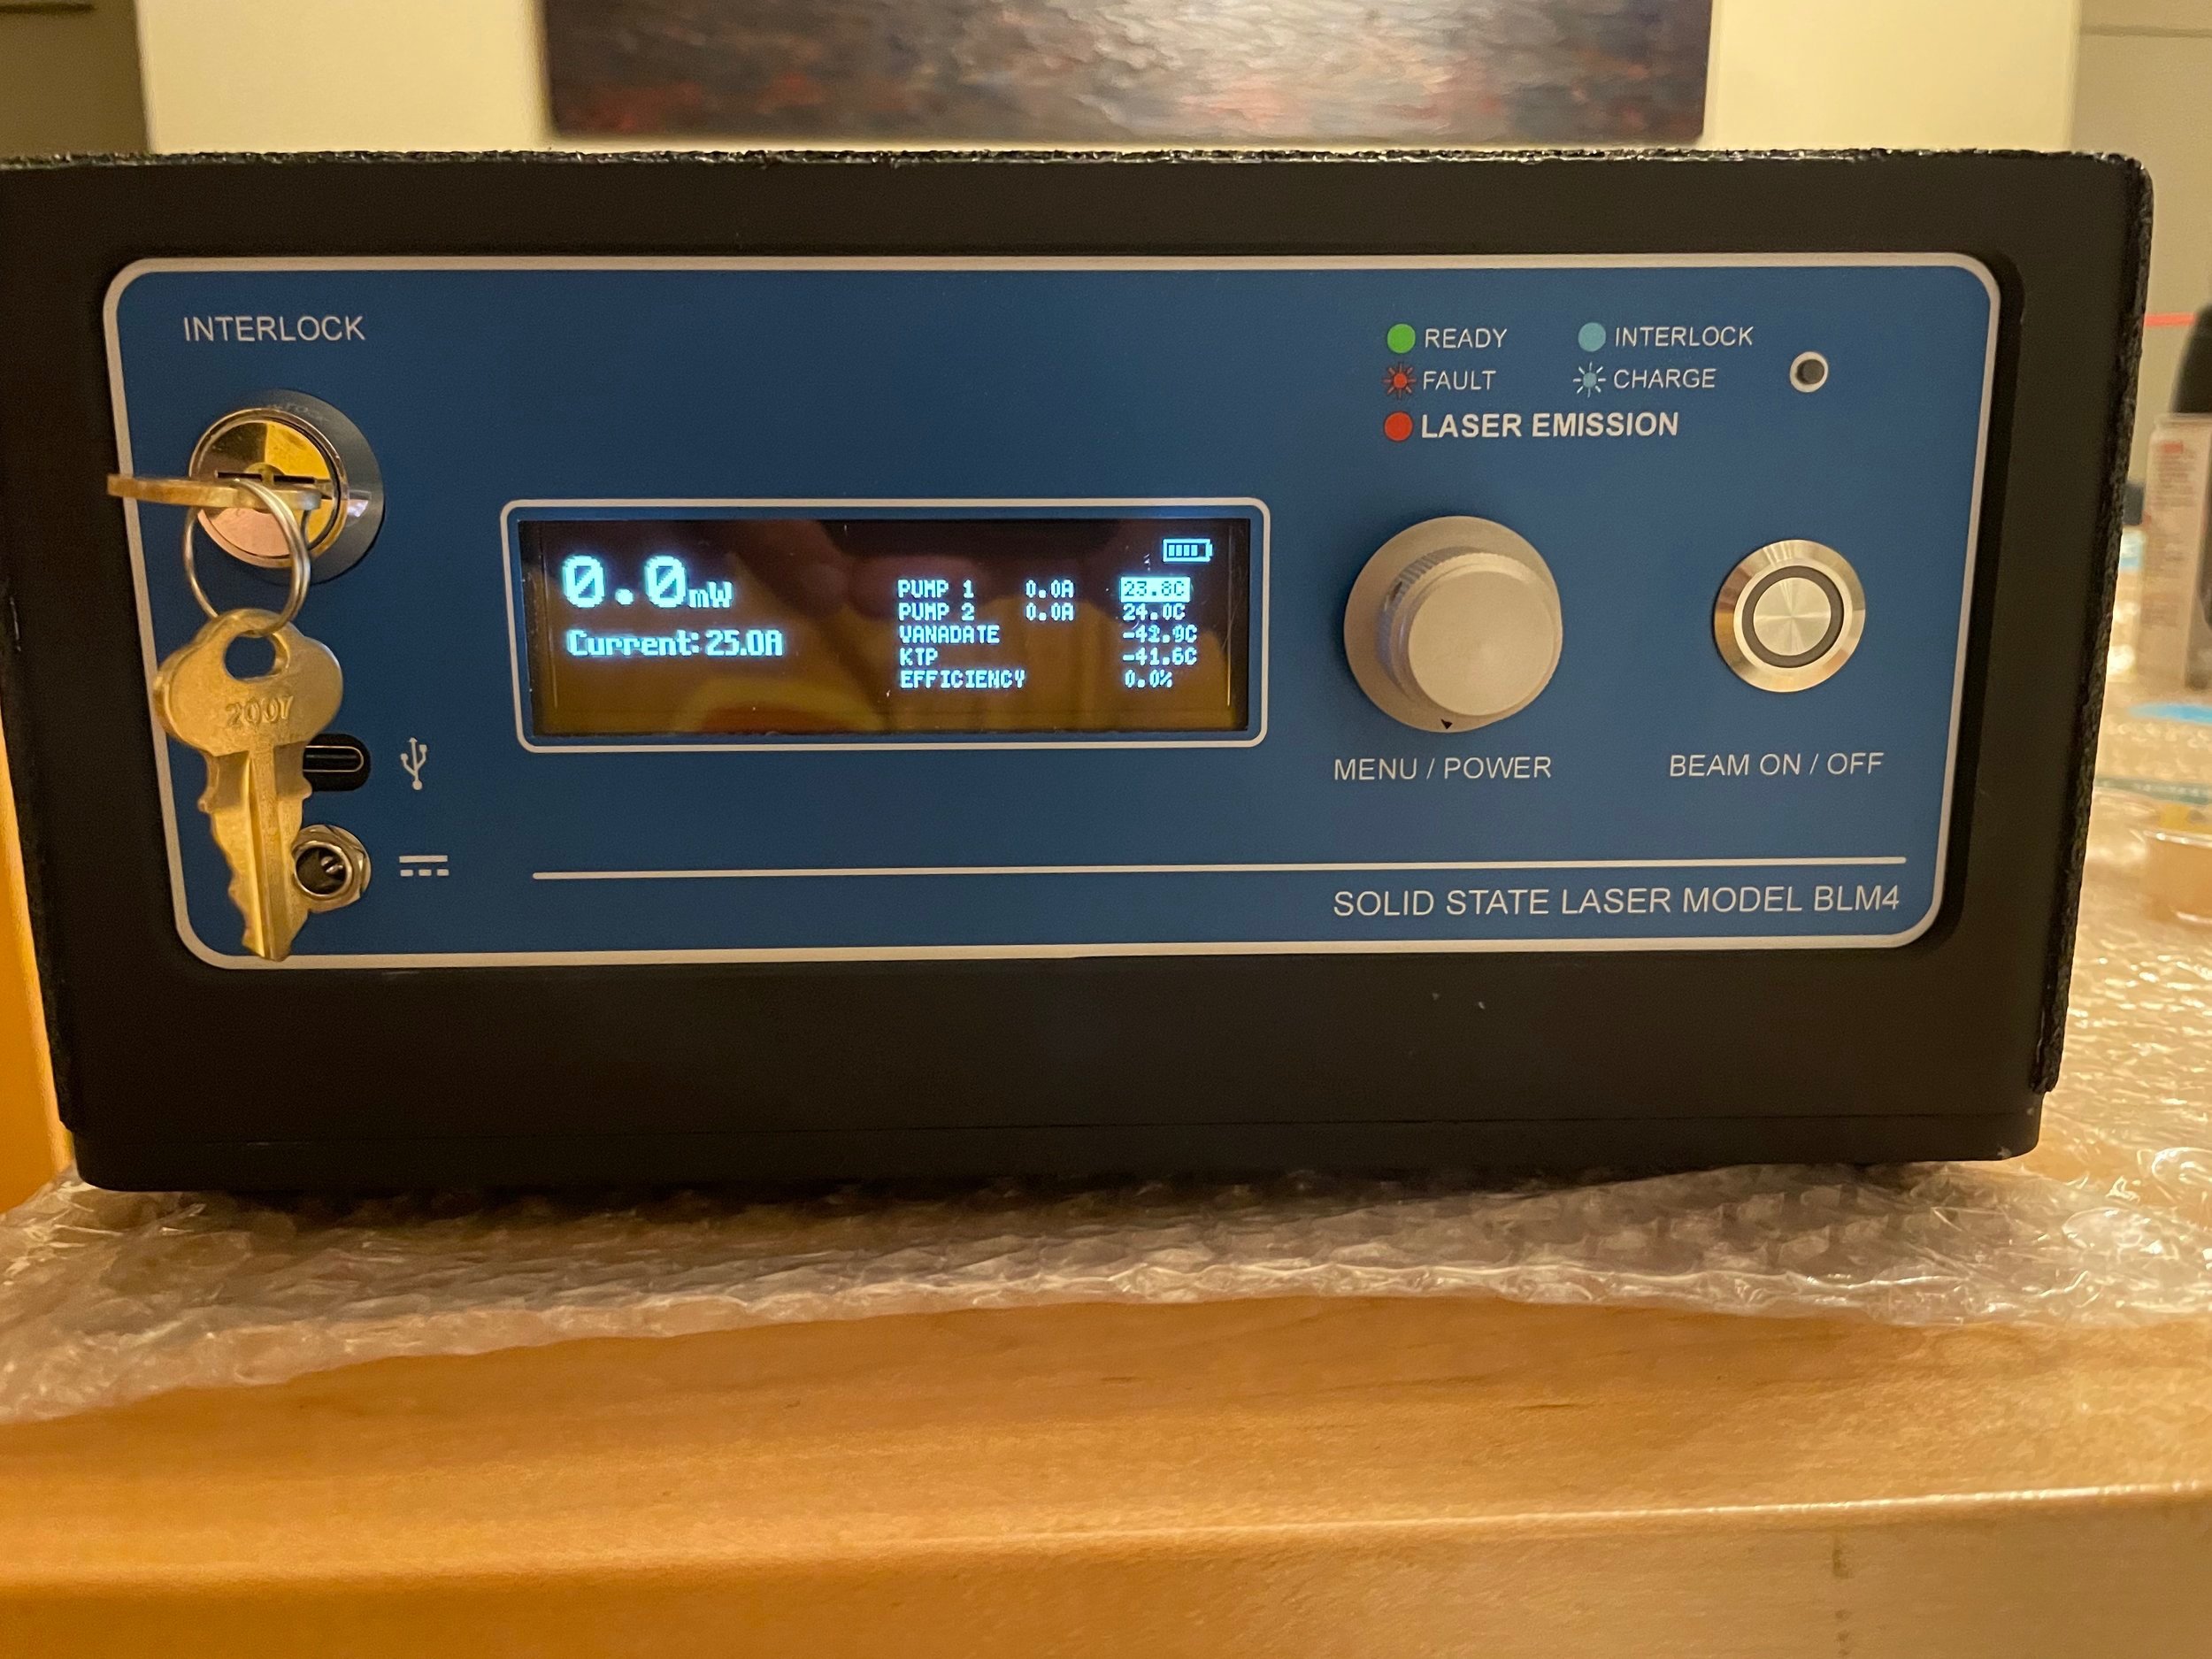
Oh, but it wasn’t over. I designed a custom front panel overlay and had some plexiglass custom cut to shape for the display. And I had some nice laser warning stickers printed. And I bought dozens of different kinds of screws to hold it all together including some cool “crushable” washers that when crushed form a completely watertight seal. I used those on the bolts that hold the carry handles on so no moisture gets into the resonator if the top cover gets wet. I even designed a lens cap I had 3D printed out of TPU. In short: I lost control.
Christmas in May
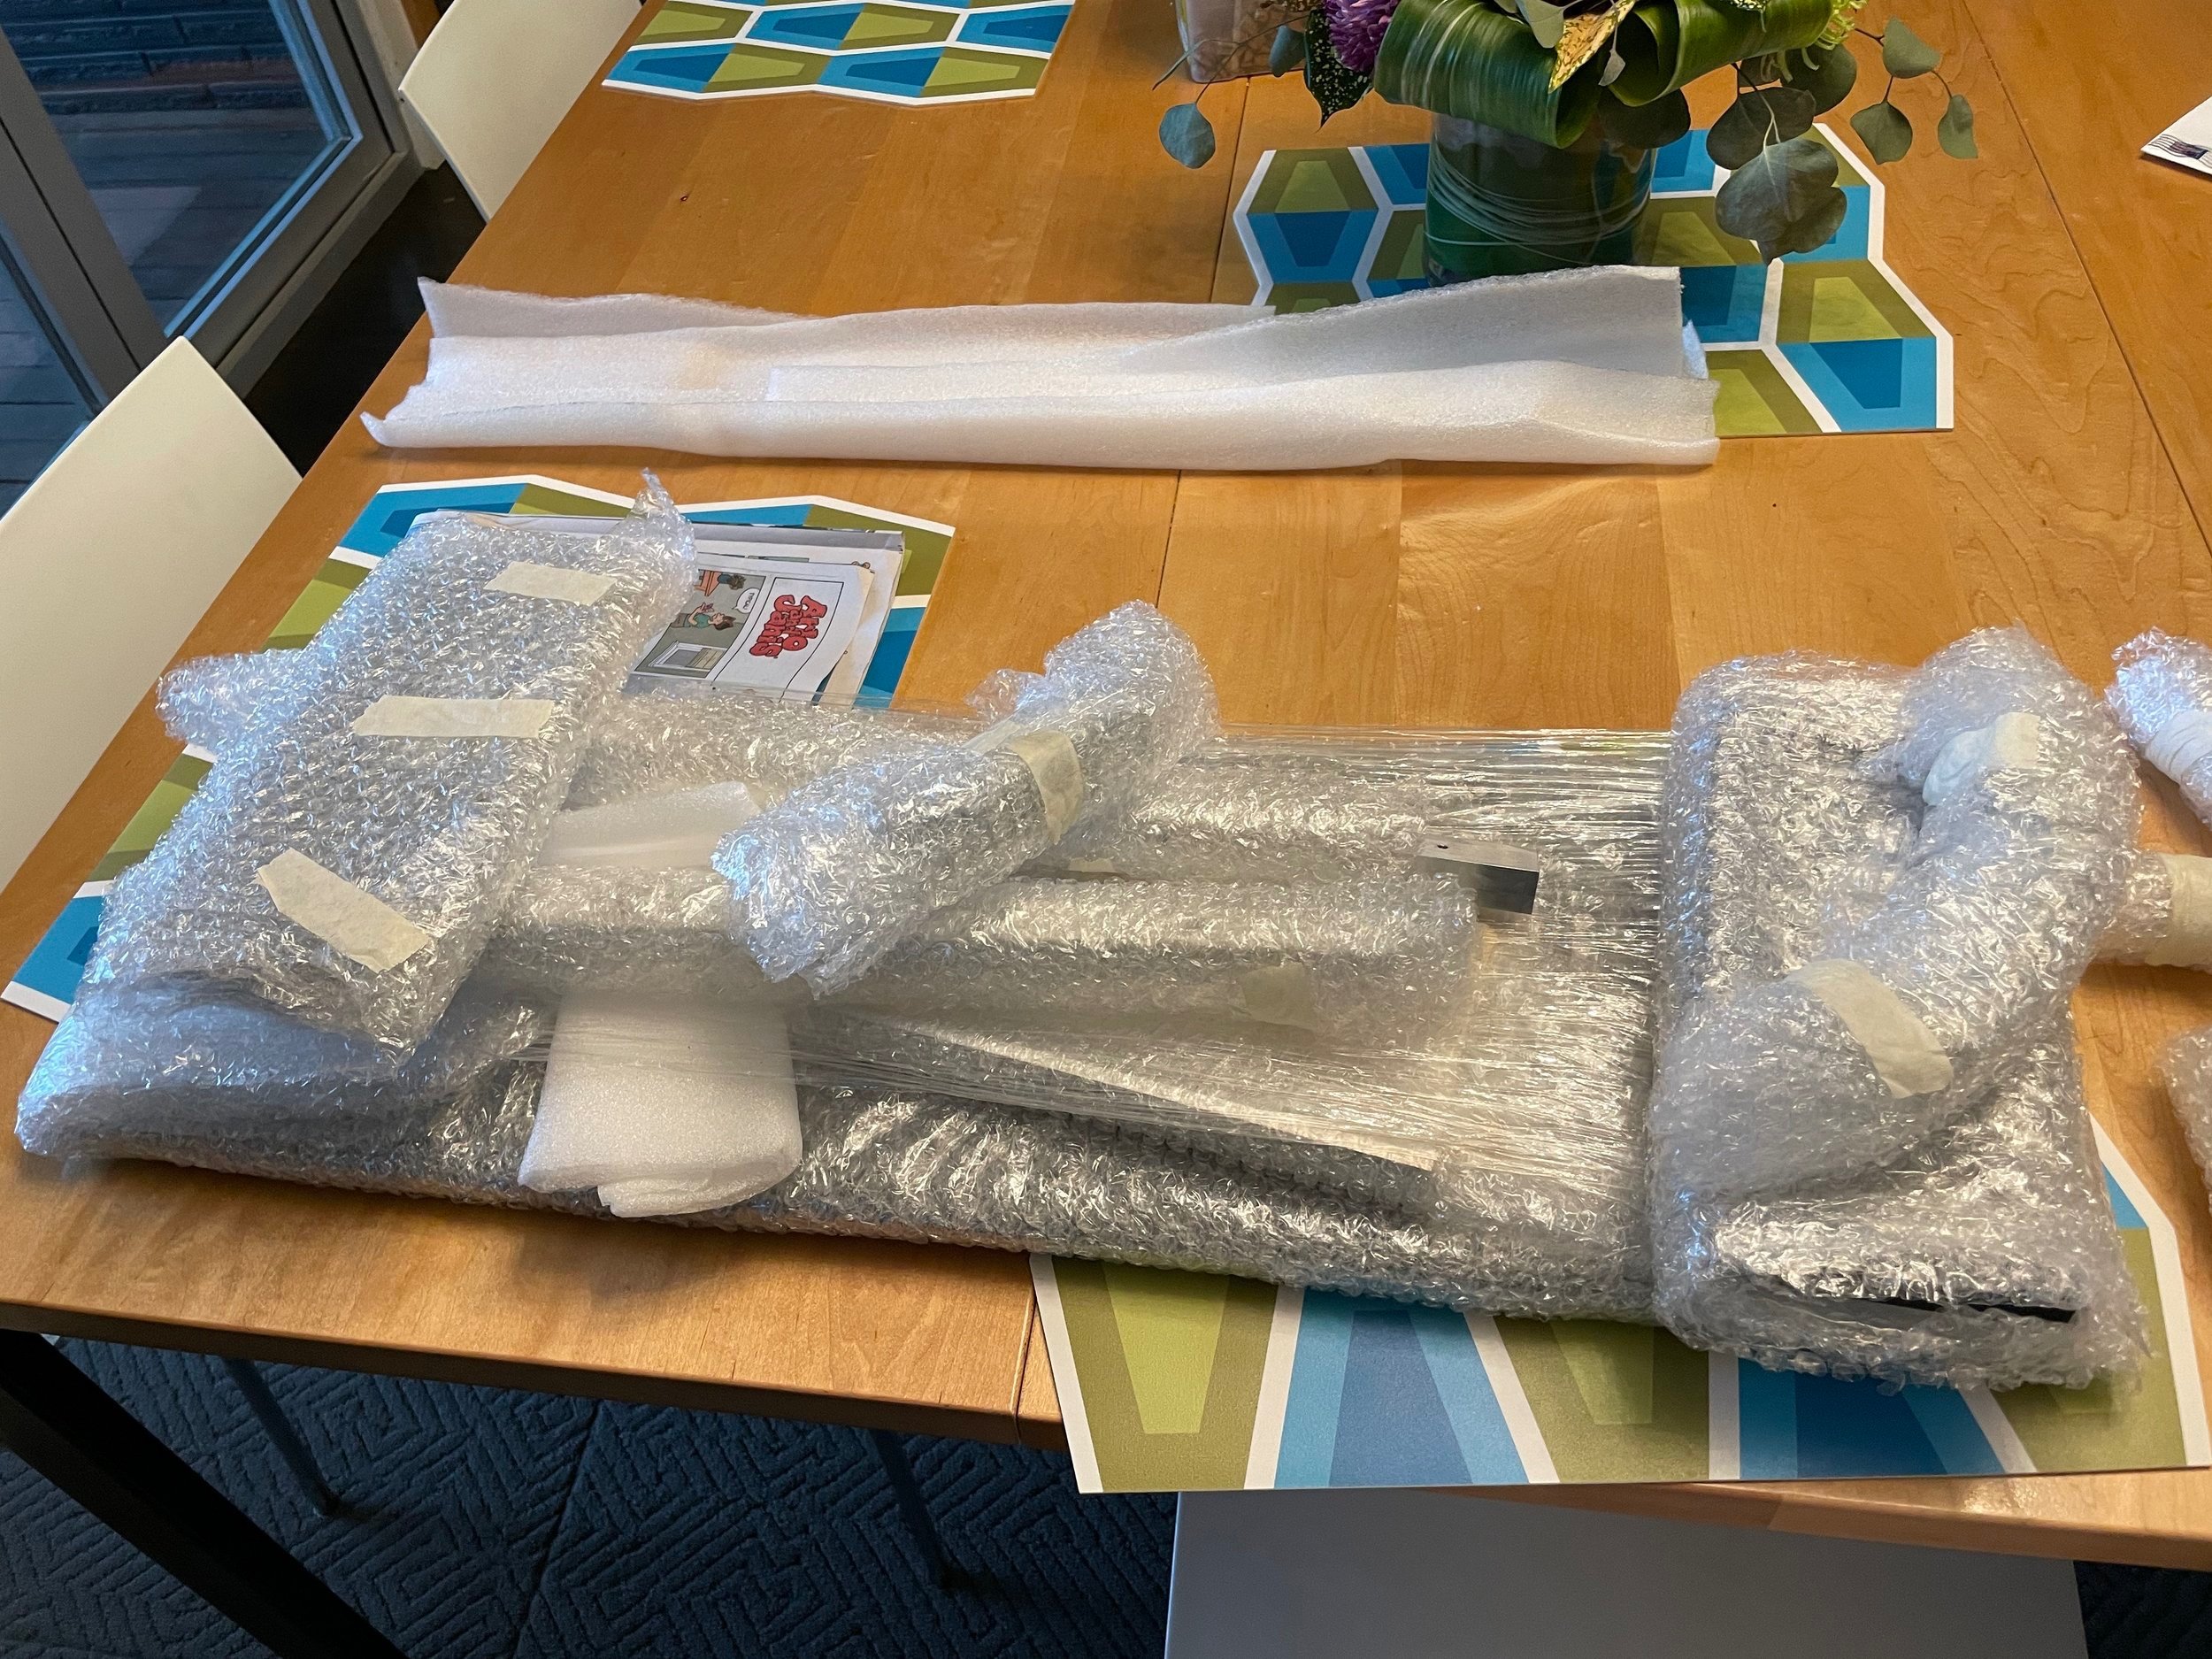
My Hubs order arrived on late May. Here’s a small gallery of photos showing the parts and the assembly process.


Some video of it in action:
Video of the laser starting at low power and then ramping up.
Not All Perfect
So the chassis generally is working pretty well. Aside from the giant “the laser doesn’t produce the power it should” problem there are some problems with the project I won’t be fixing:
This thing weighs a lot. Yes, it has handles and yes, they are balanced so you can hold it in one hand and work the controls with another. But it weighs fifty pounds. I type for a living. Fifty pounds is not something I want to carry around in one hand.
The fans run when charging. That’s fine. But they don’t shut off when the charging cycle is done. I just never thought about it and the fan power is hardwired to always be on. I already fixed it in another revision of the power board, but I will probably never build it.
I had to bodge the control panel board a lot. It was the first revision and there were quite a few mistakes on it. This I may respin out of pride, but the bodged one works fine.
The bends in the fiber optics are tighter than I would like.
The beam comes out at a minor angle. This happens because the output mirror is at 45º and this causes an offset in the beam from center. That offset beam passes through a beam expander and those lenses end up bending the beam at an angle.
One thing that did work rather well is getting to the resonator. I wanted to do some experiments with a different output coupler and for this I needed to setup an alignment laser and swap a mirror out. I was able to do this without removing the resonator from the chassis: I removed the top cover mounting bracket from one side and bolted another optical breadboard onto the resonator as it sat in the chassis. This is a huge advantage because removing it entirely requires I can still connect the fiber optics and TEC cables:
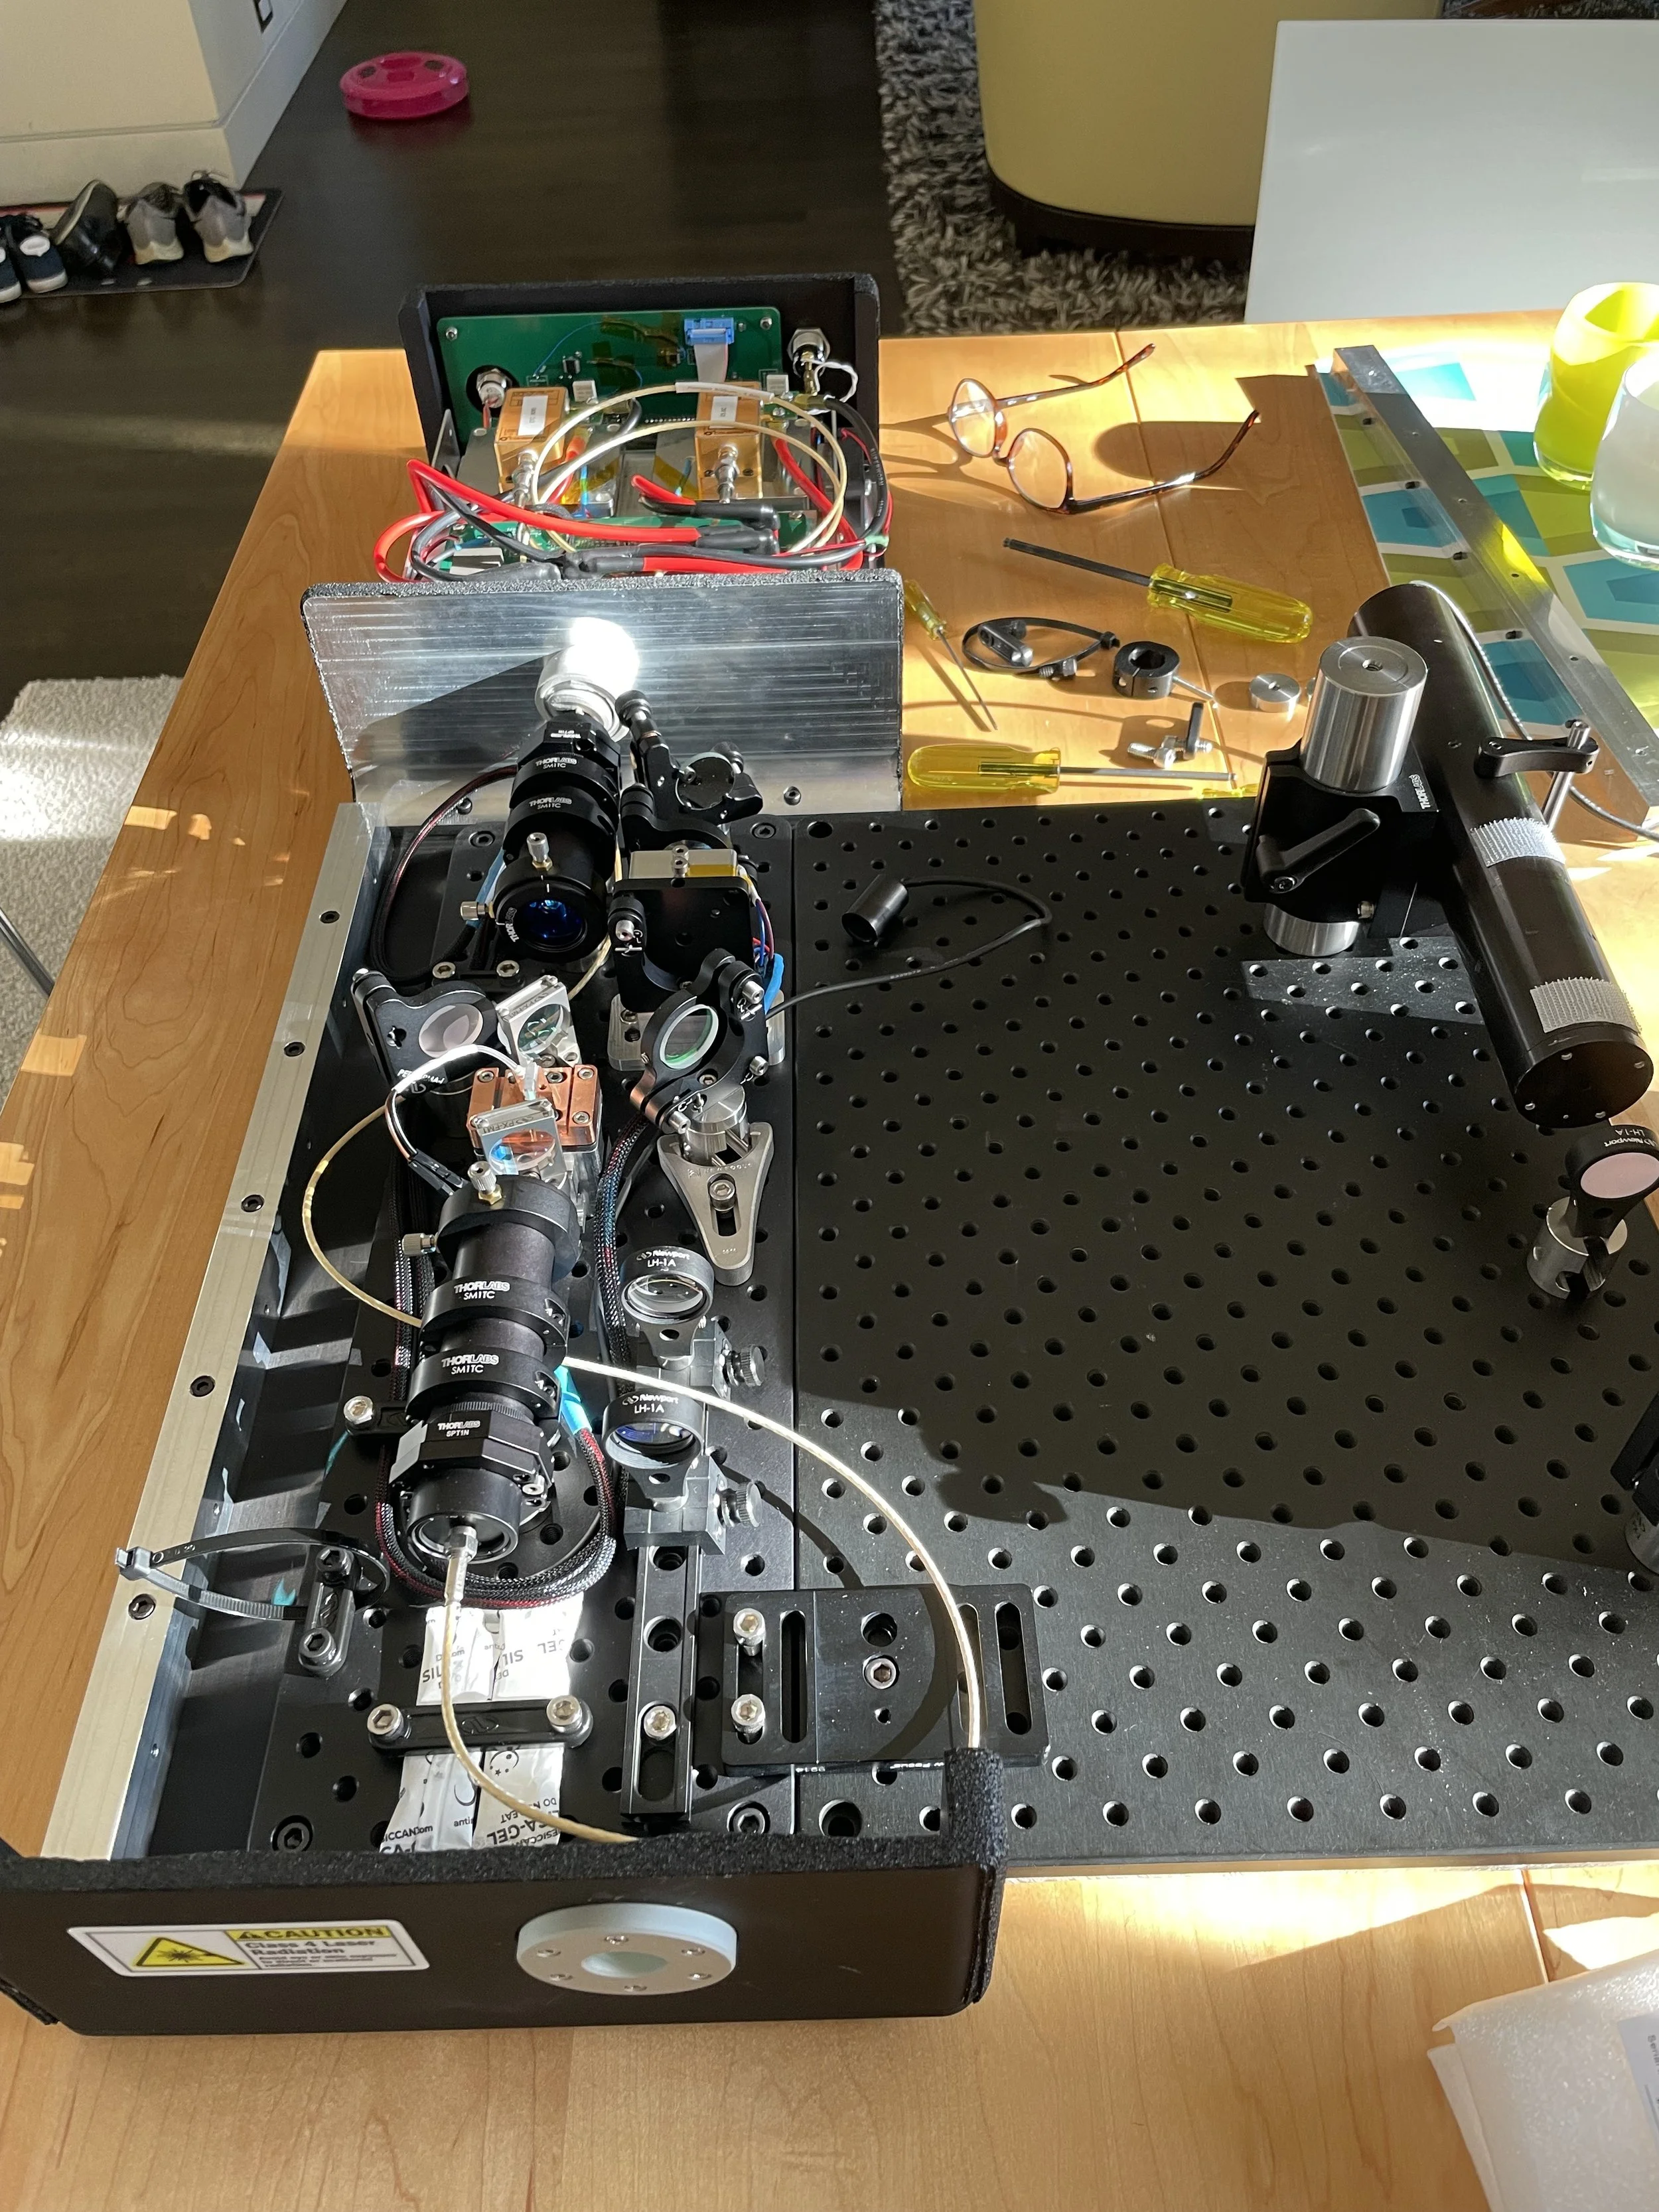
Additional breadboard bolted onto resonator with an alignment laser setup.
Just One More Thing
I’m taking this laser on a camping trip. For giggles. I don’t want to ruin it, so I had a small case made for it:


That’s about all I have. Next up is to figure out why I’m not getting the power I expect. I need to learn a lot more laser physics for this and do the necessary math to better understand what I should expect the cavity can deliver. That is going to take some time.